Download the latest version of VSDC

e.
 Download the latest version of VSDC
Let’s explore a few methods for adding files.
Method 1: Using the Menu
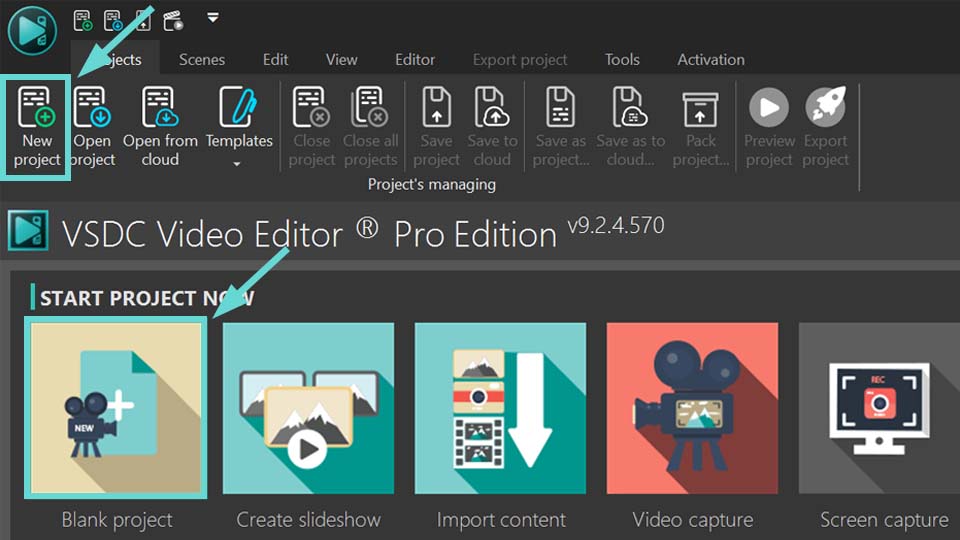
Start a new project by clicking on the “Blank Project” option on the start page or on the “New Project” option in the top horizontal menu. Set the resolution, framerate, rename your project if necessary and click on “Finish”.
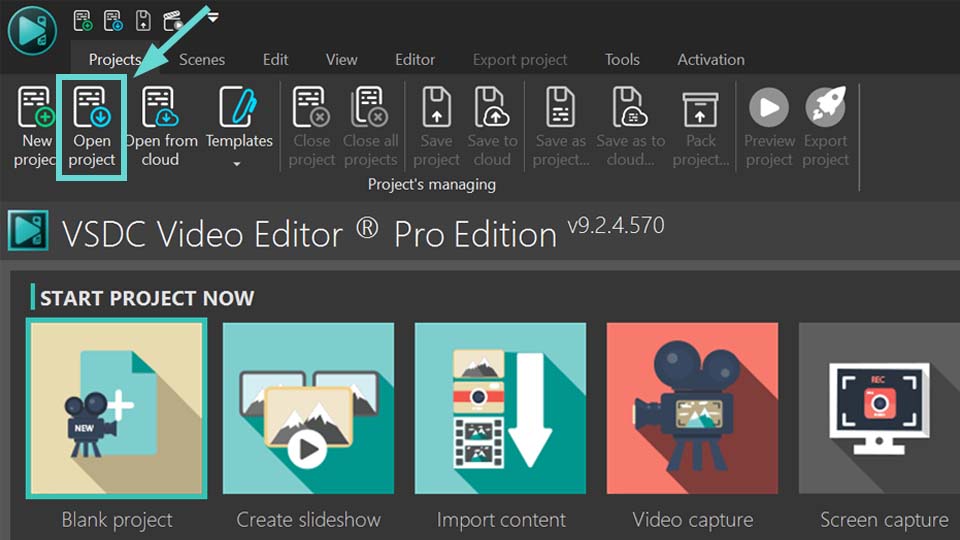
If you already have a saved project, click on the “Open Project” option in the menu bar and find it in the window that appears.
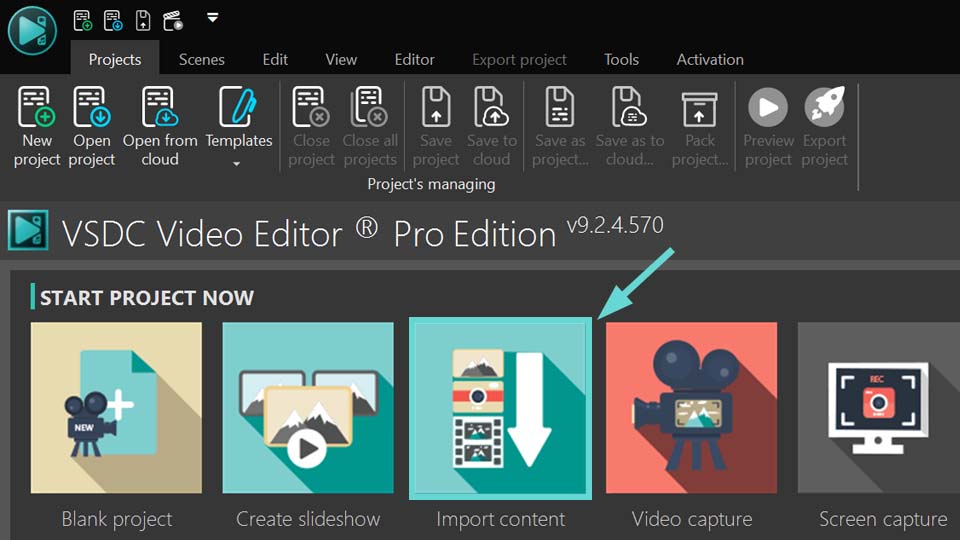
If you need the project settings (resolution, framerate, etc.) to match the parameters of a certain video file, click on the “Import Content” option. Then find your video in the opened window and the program automatically adjusts the project according to the selected file.
When you create a new project, an empty scene appears on the screen.
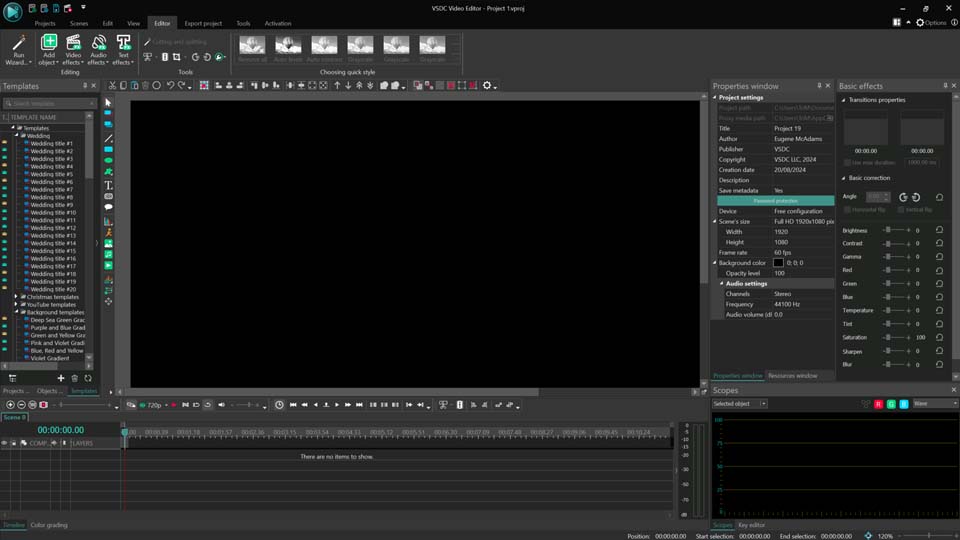
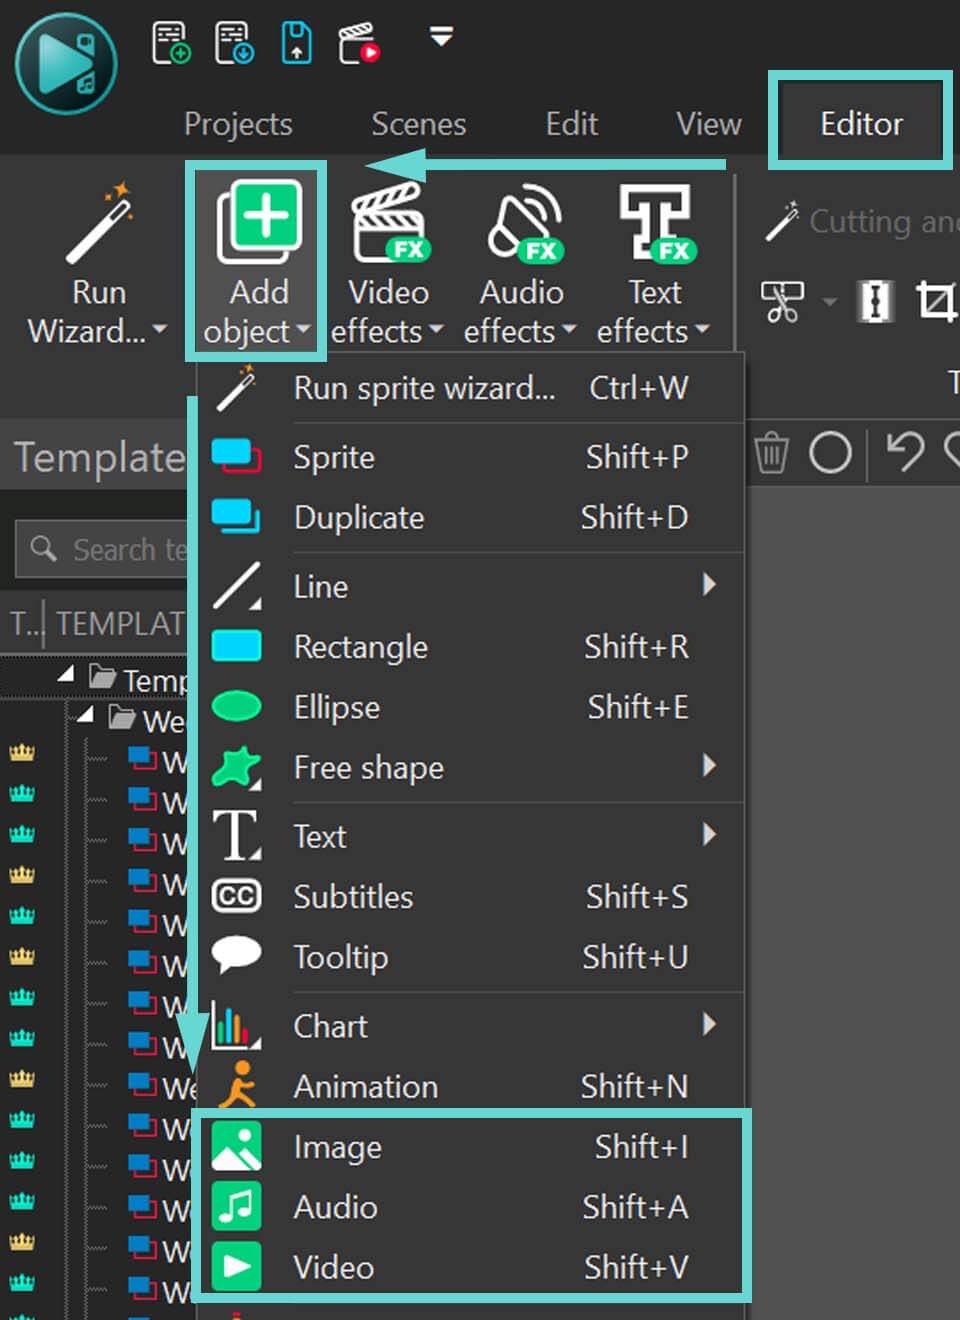
To add a file, you need the “Editor” tab: click on it, then click on the “Add Object” option, select the appropriate file type (image, audio or video) and add the selected object by clicking on it twice with the left mouse button.
After that the “Object Position Settings” window opens, where you can adjust the parameters at your discretion if necessary.
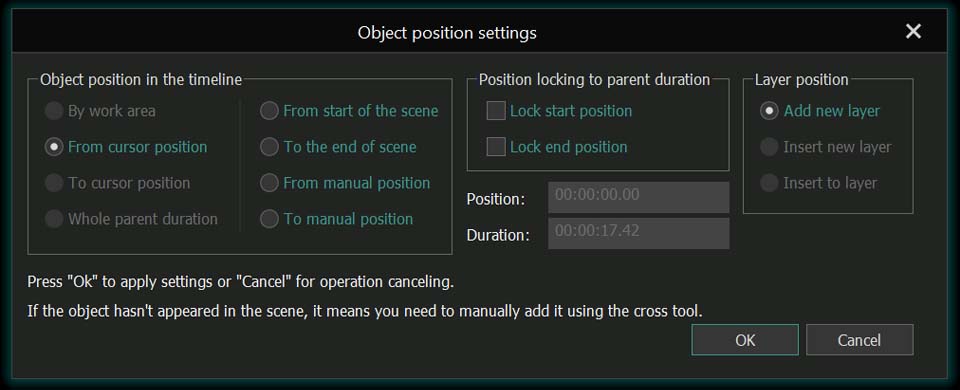
If it is a new project, some settings can be not available.
Click on “OK” and your file appears on the scene and timeline.
Method 2: Using the Toolbar
Start a new project or continue a previously started one (see Method 1).
On the vertical toolbar on the left of the scene, find the appropriate icon to place the file of the type you need (image, audio object or video object).
![]()
Select the desired object position settings, click “OK”, and the file appears on the scene and timeline.
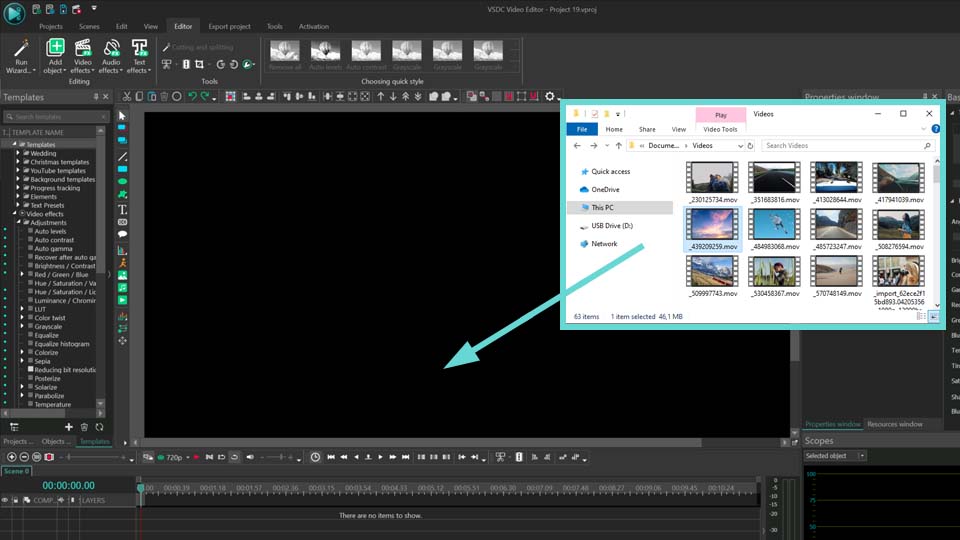
Method 3: Using Drag-and-Drop Tool
Another useful feature of the VSDC Video Editor is the possibility to drag and drop objects from your computer into the editor.
To add an object this way, open the File Explorer, left-click the file you want and drag it onto the stage or timeline. The file appears immediately.
Method 4: Using the Resources Window
The Resources Window contains all the files (images, video and audio) you are working on in the project. You can place all the files here at once when you start a project, which you can then drag and drop from this window to the scene and timeline as you work on the project.
Using the drag-and-drop tool described in Method 3, left-click on the file you need in File Explorer and drag it into the Resources Window. You can also use the + icon at the bottom of the Resources Window.
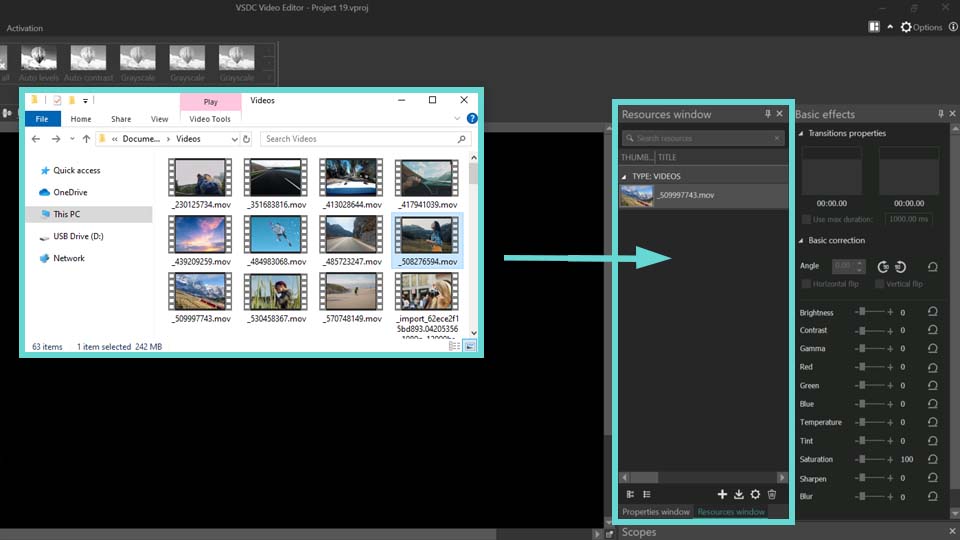
Then left-click on the object and drag it to the scene or timeline. The file appears immediately.
NB! If you need to set the position of a file when adding it to the scene, open the options (top right corner), click on the “Editor Options” option and check the “Set Object Position Parameters when Adding Video or Image to the Scene” box.
Using Methods 1 and 2, when you select the file you want, the mouse cursor takes the shape of a crosshair and you will manually place it by selecting the desired position and size of the object.
Using Methods 3 and 4, the object appears in the Resources Window even if you drag it onto the scene as described in Method 3, from where you can move it onto the scene and timeline. When you do it, the mouse cursor also takes the shape of a crosshair, and you manually place the file at the position and size you need.
Conclusion
Now you know how to add a file to VSDC Video Editor. We hope you found this article useful.
If you are a beginner, we also recommend you to read our article about VSDC basic operations.
In addition, before finishing your project, read the instructions on how to export the video and save it to your computer in the format you need.
Do you still have questions?
Contact us via email at support@videosoftdev.com or on Facebook and X.
You can get more information about the program on Free Video Editor' description page.


0 Comments